Jenkins
Setting up Jenkins as a Continuous Integration (CI) system within Spinnaker lets you trigger pipelines with Jenkins, add a Jenkins stage to your pipeline, or add a Script stage to your pipeline.
Prerequisites
To connect Jenkins to Spinnaker, you need:
- A running Jenkins Master at version 2.x, reachable at a URL
(
$BASEURL) from where Spinnaker runs. - A username/API key (
$USERNAME/$APIKEY) pair able to authenticate against Jenkins using HTTP Basic Auth, if Jenkins is secured. A user’s API key can be found at$BASEURL/user/$USERNAME/configure.
Add your Jenkins master
Add the following to igor-local.yml to enable Jenkins;
jenkins:
  enabled: true
  masters:
    - name: my-jenkins-server
      address: https://my.jenkins.example.com/jenkins
      username: encrypted:secret
      csrf: false
      jsonPath: <OPTIONAL> when using google auth
      oauthScopes:
        - when using google auth
      token: encrypted:secret:ideally
      itemUpperThreshold: <OPTIONAL> maxItemsToProcessPerPollCycle
      trustStore: <OPTIONAL> whenUsingCustomCerts
      trustStoreType: <OPTIONAL> JKS or PKCS12
      trustStorePassword: <OPTIONAL> if needed, native is changeit
      keyStore: <OPTIONAL> If using MTLS
      keyStoreType: <OPTIONAL> PKCS12 or JKS
      keyStorePassword: <OPTIONAL>
      skipHostnameVerification: toSkipTLSValidation
      ciEnabled: defaultsTOFalse
      permissions:
        READ:
          - groupName
        WRITE:
          - groupName
It is recommended to use encrypted secrets for password information in the above
Note: If you use the GitHub OAuth plugin for authentication into Jenkins, you can use the GitHub $USERNAME, and use the OAuth token as the $APIKEY.
Configure Jenkins and Spinnaker for CSRF protection
To enable Spinnaker and Jenkins to share a crumb to protect against CSRF…
-
Configure Spinnaker to enable the
csrfflag. Make sure thecsrfvalue as mentioned above is set to true.Here’s what your configuration looks like:
jenkins: enabled: true masters: - name: <jenkins master name> address: http://<jenkins ip>/pathIfNeeded username: <jenkins admin user> password: <admin password> csrf: true -
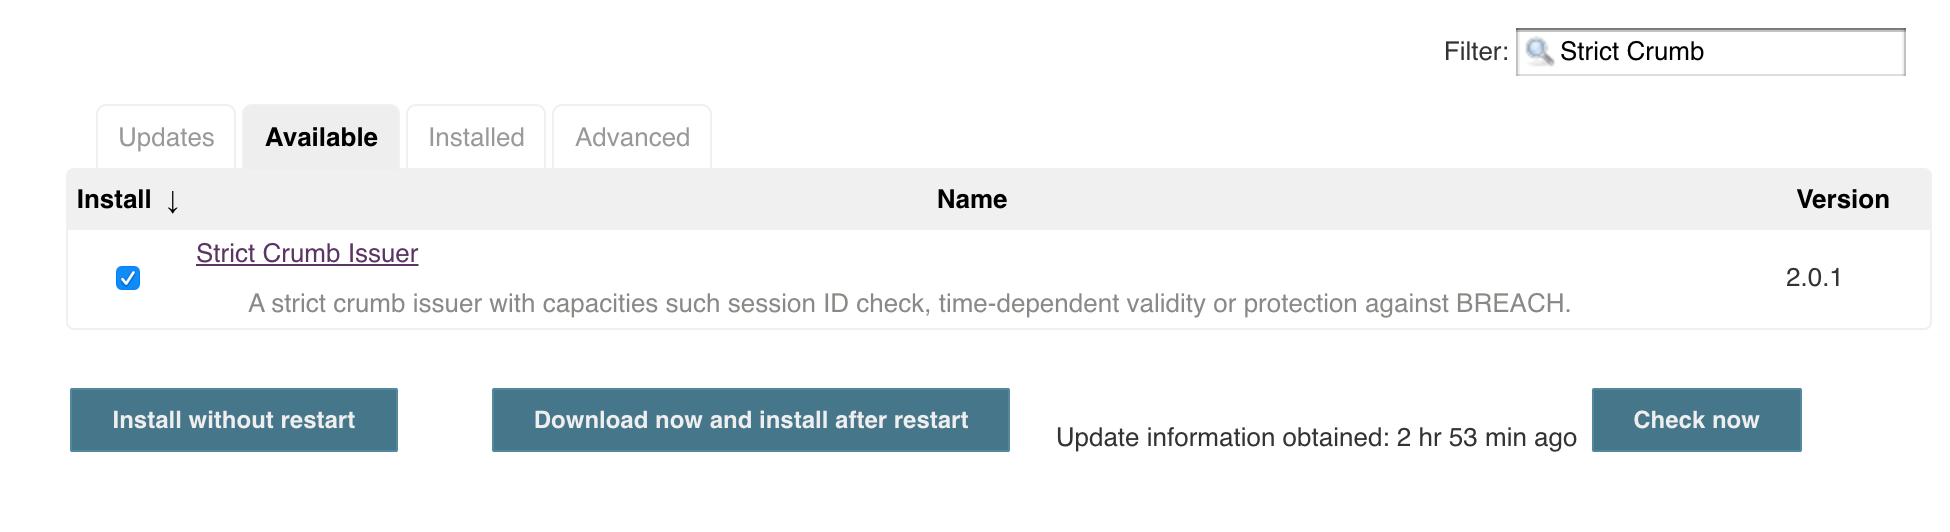
Install Strict Crumb Issuer Plugin in Jenkins:
a. Under Manage Jenkins > Plugin Manager > Available, search for Strict Crumb Issuer Plugin, select Install
-
Enable CSRF protection in Jenkins:
a. Under Manage Jenkins > Configure Global Security, select Prevent Cross Site Request Forgery exploits.
b. Under Crumb Algorithm, select Strict Crumb Issuer.
c. Under Strict Crumb Issuer > Advanced, deselect Check the session ID

Enabling Backlinks from Jenkins to Spinnaker
You can configure orca such that it will update the description of a running Jenkins build and generate a suitable backlink.
Add the following to your orca-local.yml file the following:
spinnaker:
  baseUrl:
    www: https://spinnaker.ui.url
Jenkins backlinks will be generated as follows:
This build was triggered by '<a href=...>{Pipeline Name}</a>' in Spinnaker.
Next steps
You can use Jenkins in your pipelines in one of three ways:
- As a pipeline trigger
- Using the built-in Jenkins stage
- Using the Script stage
After you’ve completed the setup above, you’re ready to trigger pipelines with Jenkins or run the Jenkins stage. This is sufficient for most use cases. See Triggering Pipelines with Jenkins for more information.
Using the Script stage requires further configuration. See Configuring the Script Stage to finish setting it up.